
Why Is My Roof Leaking Around the Chimney? (And How to Fix It)
A leaking roof is a homeowner’s worst nightmare, but when that leak originates around the chimney, the frustration multiplies. You might notice a water stain spreading across your living room ceiling, a faint musty odor near the fireplace, or even a steady drip during a heavy downpour. Because the chimney penetrates all layers of your roofing system, it creates a structural vulnerability that is highly susceptible to water intrusion. Ignoring a chimney leak can quickly lead to compromised structural framing, ruined drywall, and hazardous mold growth. Understanding exactly why your roof is failing in this specific area is the first step toward safeguarding your investment and regaining peace of mind.
To tackle a chimney leak effectively, you must understand that the issue rarely stems from a single, isolated component. The intersection of a brick masonry structure and a sloped roof involves a complex interplay of materials, including wood, metal, and mortar, all of which expand and contract at different rates. When water finds its way through these shifting boundaries, diagnosing the root cause requires a systematic approach. This comprehensive guide will walk you through the primary culprits behind chimney leaks, provide actionable steps to identify the damage, and outline the exact procedures required to fix the issue permanently.
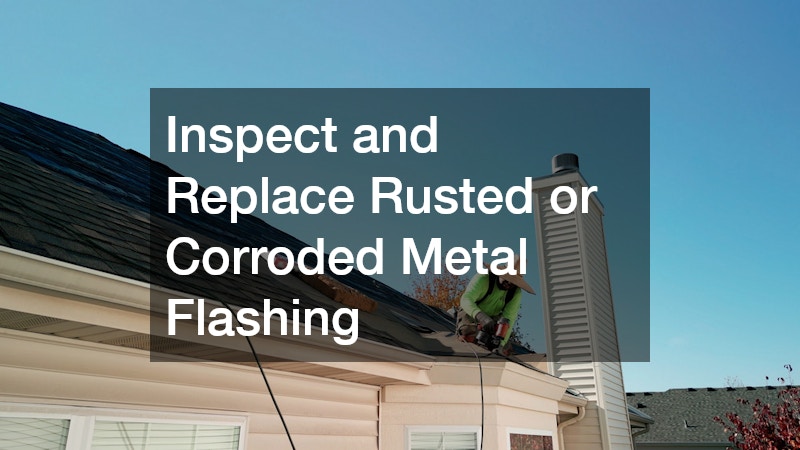
Inspect and Replace Rusted or Corroded Metal Flashing
Flashing is the critical barrier that seals the gap between your chimney masonry and the shingles. Over time, exposure to harsh weather causes galvanized steel or aluminum flashing to rust, warp, and pull away from the structure. When this happens, rainwater running down the side of the chimney flows directly underneath your shingles instead of being diverted onto the roof surface. Inspecting this area requires safely climbing onto the roof to look for small pinholes, cracked sealant, or metal sections that have lifted completely out of place.
If you discover that the metal has corroded beyond simple repair, the entire flashing system must be replaced. You will need to carefully pry up the surrounding shingles, remove the old, rusted metal, and install new step flashing and counter-flashing. For homeowners dealing with complex roof geometries or steep pitches, attempting this DIY repair can be dangerous and technically challenging. In these scenarios, reaching out to established roofing companies is the safest option to ensure the new metal is custom-bent and integrated flawlessly. Securing a professional roofing service guarantees that the flashing is counter-flashing into the mortar joints correctly, preventing future leaks.
Seal Fractured Mortar Joints and Porous Bricks
Brick and mortar may seem completely impervious to water, but they are actually highly porous materials that absorb moisture like a sponge. During the winter, this absorbed water undergoes a freeze-thaw cycle, expanding as it turns to ice and fracturing the mortar joints holding the bricks together. Once the mortar begins to crumble, rainwater seeps into the interior of the chimney column, traveling downward until it pools on your ceiling. Look closely for white, powdery stains on the brick surface—known as efflorescence—which indicates that water is actively moving through the masonry.
Fixing damaged masonry involves a process called tuckpointing, where the cracked, failing mortar is carefully scraped out and replaced with fresh, weather-resistant mortar. Once the mortar cures, applying a breathable, silane-siloxane-based water repellent to the entire exterior of the chimney is highly recommended. This specialized sealant stops water from soaking into the bricks while still allowing internal moisture vapor to escape. If the masonry deterioration is widespread, hiring a specialized residential roofer will ensure the structural integrity of the chimney remains intact. Relying on a skilled local roofer ensures the work complies with regional building codes and can withstand local weather extremes.
Repair or Install a Structural Chimney Cricket
If your chimney is wider than 30 inches and sits perpendicular to the slope of your roof, it acts as a dam for flowing water. Debris like leaves and twigs piles up behind the chimney, holding moisture against the roof deck and rotting the underlying wood. To prevent this, a chimney cricket—a small, pointed, V-shaped roof structure—must be built on the upslope side of the chimney to split the water flow and divert it around the masonry. Without a properly functioning cricket, even the best flashing will eventually fail under the sheer volume of standing water.
Building a cricket involves framing a small wooden ridge, covering it with plywood decking, and layering it with ice and water shield before applying the final roofing material. This is an advanced architectural fix that requires precise mathematical calculations to match the pitch of your primary roof. Because of the structural modifications required, it is wise to consult a reputable roofing company to handle the carpentry and waterproofing. Getting detailed roof repair plans from professionals prevents water from backing up under your shingles and causing catastrophic structural rot.
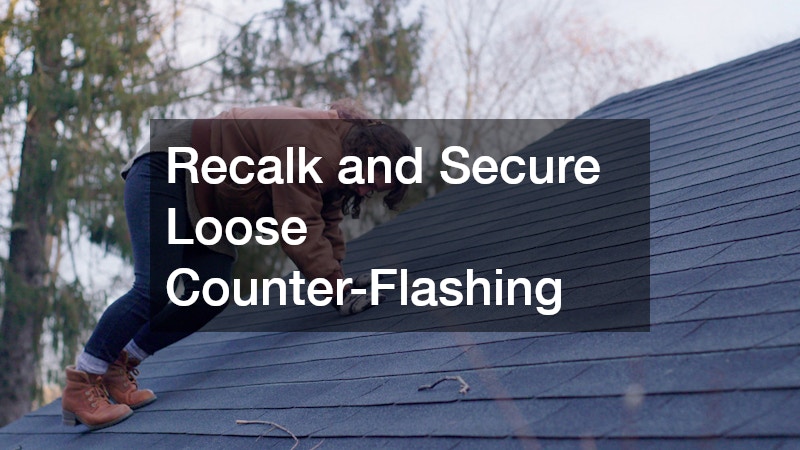
Recalk and Secure Loose Counter-Flashing
Counter-flashing sits over the step flashing, embedded directly into the chimney’s mortar joints to shed water downward. Over the years, the polyurethane caulk or silicone sealant used to seal the top edge of this metal strip degrades from UV exposure, leaving an open gap where water can slide right behind it. When wind-driven rain hits the side of the chimney, it enters this unprotected seam, bypassing all lower defenses.
To resolve this issue, you must scrape away every remnant of the old, dried-out caulk using a wire brush and a putty knife until the metal and mortar are completely clean. Next, apply a generous bead of high-grade, UV-resistant polyurethane roofing sealant directly into the joint. It is vital to use a sealant specifically formulated for exterior masonry and metal expansion, as standard household caulk will quickly crack under temperature swings. If you find that the metal tabs have completely popped out of the mortar, contacting a specialized local roofer can ensure the flashing is securely anchored back into the brick.
Replace a Cracked or Missing Chimney Cap
The chimney cap is the concrete or metal lid sitting at the very top of your chimney structure, designed to shed water away from the flue. Concrete caps, often called crowns, frequently develop deep cracks as the house settles and shifts over time. When rain falls on a cracked concrete crown, water penetrates the cracks and travels straight down the interior flue lining, manifesting as a mysterious leak inside your fireplace firebox.
- Step 1: Thoroughly clean the chimney crown surface with a stiff wire brush to remove moss, dirt, and loose concrete.
- Step 2: Fill large, deep cracks with a high-performance elastomeric concrete patch material using a putty knife.
- Step 3: Apply a thick, brushable elastomeric crown sealer over the entire surface, extending it over the top edges to create a seamless rubberized barrier.
- Step 4: Install a stainless steel or copper chimney cap over the flue opening to add a secondary layer of shedding protection against vertical rainfall.
Properly maintaining this top-level defense is crucial because it protects the entire masonry column below it from water saturation. If you inspect the top of your chimney and realize the concrete crown has completely shattered, simple coatings will not suffice. You will need to seek roof estimates for a complete crown rebuild from trusted local roofing contractors who possess the masonry tools required to pour a new concrete slab safely at heights.
Correct Improper Shingle Overlaps and Underlayment Installation
Sometimes, the leak isn’t caused by the chimney itself, but rather by how the surrounding shingles were integrated with the waterproofing layers. If the roofing felt or ice and water shield was not run up the side of the chimney walls before the flashing was installed, water will inevitably find a path inward. Additionally, if the shingles surrounding the chimney were cut too tight or too loose against the flashing channels, water can back up beneath the shingles via capillary action.
Fixing this problem requires stripping back the shingles within a two-foot radius of the chimney to inspect the bare wooden roof deck. Any rotted plywood decking must be cut out and replaced before rolling out a self-adhering, rubberized underlayment that seals tightly around the chimney base. New shingles must then be woven carefully with step flashing, ensuring the proper exposure and offset to allow water to shed unimpeded. Because this requires manipulating multiple layers of roofing, homeowners often hire professionals who specialize in residential roofing repairs and replacements to handle the complex layering. Choosing an experienced residential roofer guarantees that the water shed patterns match the rest of your home’s rooflines perfectly.

Seal Special Clearances on Durable Metal
While metal roofing is exceptionally durable and long-lasting, sealing a chimney penetration through a metal panel presents unique challenges. Metal panels expand and contract significantly more than asphalt shingles during daily temperature fluctuations, which places immense stress on the fasteners and sealants around the chimney. If the installers used standard rubber boots or failed to create a proper metal apron and transition flashing on the high side of the chimney, water will pool and penetrate the seams.
Fixing a chimney leak on a metal roof requires specialized metal-to-masonry transition flashing and heavy-duty, high-temperature butyl tape sealants. The flashing must be designed to slide independently of the roof panels to accommodate thermal movement without tearing the seals loose. Standard caulking methods will fail rapidly here, meaning you need specific tools like metal hand seamers and pop rivet guns to lock the custom-bent metal pieces together. Given the technical complexity and the risk of voiding your roof warranty, it is highly recommended to contract a dedicated roofing service with proven experience in standing seam and exposed fastener metal systems.
Clear Clogged Valleys and Debris Dams
Roofs with complex architectures often feature valleys that direct water flow past one or more sides of a chimney. When autumn leaves, pine needles, and small twigs accumulate in these valleys, they form a dense organic dam that traps water. As the water pools behind this debris, its level rises above the top edges of the flashing, pouring straight down into the unshielded areas of your home’s attic.
Clearing these dams requires regular, diligent maintenance, especially if your property is surrounded by mature trees. Use a leaf blower or a stiff broom to carefully clear all organic debris away from the chimney base and out of the adjacent valleys at least twice a year. Once the debris is gone, flush the area with a garden hose to check if the water flows freely and smoothly into your gutter system without backing up. If you notice that water has consistently backed up under the shingles and caused underlying rot, you should reach out to roofing companies to inspect the integrity of the hidden underlayment.
Address Condensation Buildup Inside the Chimney Flue
Not all moisture that looks like a roof leak is actually caused by external rainwater penetrating your shingles. If your chimney vents a high-efficiency gas furnace or water heater, the exhaust gases contain a massive amount of water vapor. If the chimney flue is unlined, poorly insulated, or improperly sized, this warm vapor cools and condenses into liquid water inside the upper sections of the chimney, eventually soaking through the bricks and staining your indoor plaster.
To diagnose this hidden issue, you need to determine if the staining occurs exclusively during heavy rainstorms or if it persists during cold, dry winter days when your heating system runs constantly. Resolving internal condensation requires installing a properly sized, insulated stainless steel chimney liner that keeps exhaust gases hot enough to exit the chimney before turning into liquid. Because this deals with fuel-burning ventilation, it is critical to have a professional examine the setup to ensure carbon monoxide is venting safely out of your living spaces.
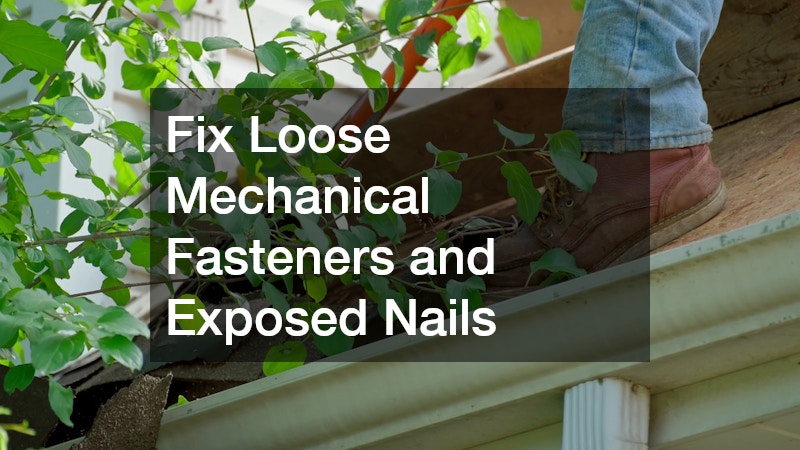
Fix Loose Mechanical Fasteners and Exposed Nails
During the initial installation of chimney flashing, installers sometimes make the mistake of driving roofing nails directly through the exposed face of the metal flashing. Over time, wind vibrations and thermal movement loosen these nails, causing them to back out of the wood decking slightly. This creates a tiny, direct pathway—often called a “shiner”—where rainwater running down the flashing flows directly along the shank of the loose nail and into your attic framing.
Fixing this problem involves carefully backing out any exposed, loose nails and replacing them with rubber-grommeted structural screws designed for outdoor roofing applications. After driving the new screws securely into place, you must coat the entire fastener head with a thick dollop of high-grade elastomeric roof sealant to shield it from direct water contact. If you discover dozens of exposed nails driven haphazardly into your flashing system, it is an indication of poor initial workmanship. In this case, obtaining comprehensive roof estimates from a certified roofing company will help you determine if it is more cost-effective to patch the errors or completely rebuild the flashing system to avoid future structural degradation.
Pinpointing and repairing a roof leak around your chimney requires a blend of keen observation, systematic troubleshooting, and a solid understanding of how different building materials interact. Whether your home is protected by traditional asphalt shingles or a sleek modern roof, keeping the chimney flashing, masonry, and cap in pristine condition is essential for long-term structural health. By addressing small cracks, clearing debris dams, and renewing degraded sealants early, you can prevent minor moisture issues from evolving into expensive drywall repairs and hazardous mold remediation projects inside your home.
While minor maintenance tasks like clearing out leaves or applying a bead of exterior caulk can easily be managed by an experienced DIY enthusiast, major overhauls should not be taken lightly. Working on a sloped roof around a heavy masonry structure presents significant safety risks and demands specialized tools and technical expertise. When structural flashing needs replacement or when the underlying wood deck shows signs of extensive rot, investing in professional assistance is always the wisest choice. Entrusting the job to qualified professionals ensures that your chimney remains completely watertight, keeping your home safe, dry, and secure for many years to come.