
Seasonal Maintenance Tasks That Prevent Costly Exterior Problems

Every season leaves its mark on the outside of your home, from spring rain to summer sun to winter ice, and small issues left unchecked can quietly turn into expensive repairs. Many homeowners only think about their roof, siding, or gutters when something visibly breaks, but by then the damage often extends beyond the surface. A little seasonal attention throughout the year can catch problems early, extend the life of your home’s exterior, and save you thousands in emergency fixes. This guide walks through the maintenance tasks that matter most, season by season, so you can protect your investment with confidence.
Spring Cleanup and Roof Inspection After Winter
Winter is hard on a home’s exterior, and spring is the ideal time to assess the damage that snow, ice, and freezing temperatures may have caused. Walk the perimeter of your house and look up at the roofline for missing shingles, cracked flashing, or granules collecting in the gutters, which can signal aging roofing materials. Pay close attention to valleys and chimney flashing, since these areas are especially prone to ice dam damage after a harsh winter.
Clear out gutters and downspouts of leaves, twigs, and shingle grit so spring rains can drain properly instead of pooling against your foundation or seeping under the roof edge. While you’re at it, check for loose or sagging gutter sections, since even a two- or three-degree drop in slope can cause water to back up.
If you notice sagging areas, water stains on interior ceilings, or daylight peeking through the attic, it is time to call in professional roofers who can identify problems you might miss from the ground. Many roofers recommend a thorough inspection every one to two years, but any visible winter damage warrants an immediate visit rather than waiting for a scheduled checkup.
Catching small issues in spring prevents them from becoming major headaches during summer storms or fall rains. Walk the perimeter of your home and look up at the roofline for missing or curling shingles, cracked flashing around chimneys and vents, and granule buildup in the gutters—all signs that winter ice and wind have taken a toll.
Don’t forget the attic: a quick check for water stains, daylight peeking through the roof deck, or musty odors can reveal leaks before they show up as ceiling damage. Moss or dark streaks on the roof surface are also worth noting, since trapped moisture can rot decking over time if left unaddressed.
A thorough inspection now can also help you budget for any necessary roof repairs before they become emergencies, rather than scrambling to find help during a downpour. Minor fixes like resealing flashing or replacing a handful of shingles often run a few hundred dollars, while neglected damage can snowball into a full roof replacement costing thousands.
- Check for curling, cracked, or missing shingles, especially on south- and west-facing slopes where sun exposure accelerates wear
- Inspect flashing around chimneys, vents, and skylights for gaps, rust, or lifted edges that let water seep in
- Look for moss or algae growth (dark streaks or green patches) that traps moisture and slowly degrades shingle granules
- Clear debris from gutters and downspouts, checking that water flows freely at least 3-4 feet away from the foundation
- Note any soft spots, sagging, or discoloration on the roof deck, which can signal hidden water damage or rot
- Scan the attic for daylight peeking through boards or damp insulation, both early warning signs of roof leaks
- Trim overhanging tree branches that scrape shingles or drop excess leaves and debris onto the roof
Gutter and Drainage Maintenance Throughout the Year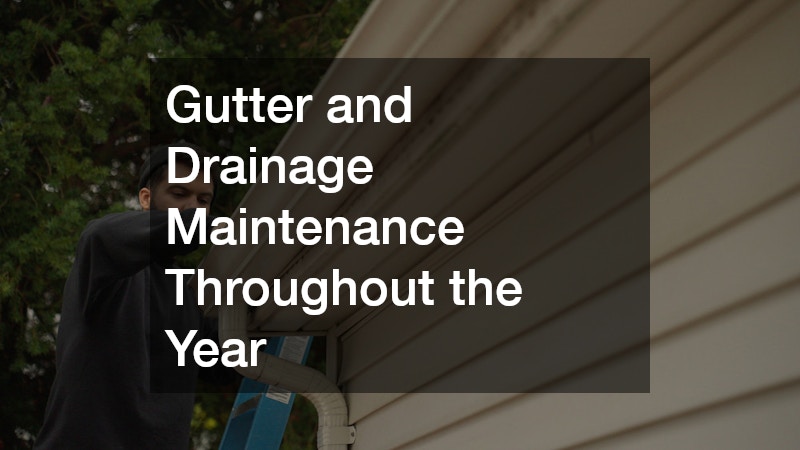
Gutters and downspouts play a bigger role in exterior protection than most homeowners realize, since they direct water away from your foundation, siding, and landscaping. Clogged gutters can cause water to back up under roofing materials or spill over onto siding, leading to rot, mold, and even foundation cracks over time. Cleaning gutters at least twice a year, in late spring and again in fall, keeps water flowing where it should.
If your property is surrounded by mature trees, plan on a third cleaning in early winter to clear out leaves and seed pods that accumulate after the fall cleanout. While you’re up there, check that downspouts extend at least 3 to 5 feet away from the foundation, since water dumped too close to the house is one of the leading causes of basement seepage and cracked slabs.
It’s also worth inspecting gutter hangers and seams during each cleaning, since sagging sections or separated joints can redirect water exactly where you don’t want it. Small issues like loose brackets or minor leaks are inexpensive to fix in the moment but can lead to fascia board rot or siding damage if ignored for a full season.
Pay attention to how water drains after a heavy rain, since pooling near the foundation or streaks on exterior walls are signs that your drainage system needs adjustment. Gutters should be pitched at roughly a quarter-inch drop for every 10 feet of length so water flows steadily toward the downspouts instead of stagnating and adding stress to the fasteners.
Downspouts should carry water at least 4 to 6 feet away from the foundation, and adding splash blocks or flexible extensions can help direct flow toward a slope that carries it further still. If you notice erosion trenches or soggy patches near a downspout outlet, that’s a clear sign water isn’t being redirected far enough from the house.
Seasonal debris is another factor worth checking twice a year at minimum, in spring and fall, since clogged gutters are one of the most common causes of overflow and fascia rot. Installing gutter guards can reduce buildup, but even guarded systems should be inspected after major storms. Left unaddressed, these small drainage issues can lead to foundation cracks, basement leaks, or siding damage that cost thousands of dollars to repair.
- Clean gutters in spring and fall at minimum, adding a mid-summer check if your property has heavy tree cover
- Install gutter guards to reduce debris buildup, but still plan an annual inspection since fine grit and seeds can slip through
- Check downspout extensions direct water at least three feet from the foundation, especially after storms that may knock them loose
- Look for sagging gutters that may need re-anchoring, which often signals loose hangers or spikes every few feet
- Watch for water stains on siding beneath gutter seams, a sign of failed sealant that’s letting water spill over
- Inspect gutter slope to confirm it drops about a quarter-inch per ten feet toward downspouts for proper flow
- Clear debris from downspout openings and underground drain lines to prevent backups during heavy rainfall
Assessing Roof Health Before Summer Heat Sets In
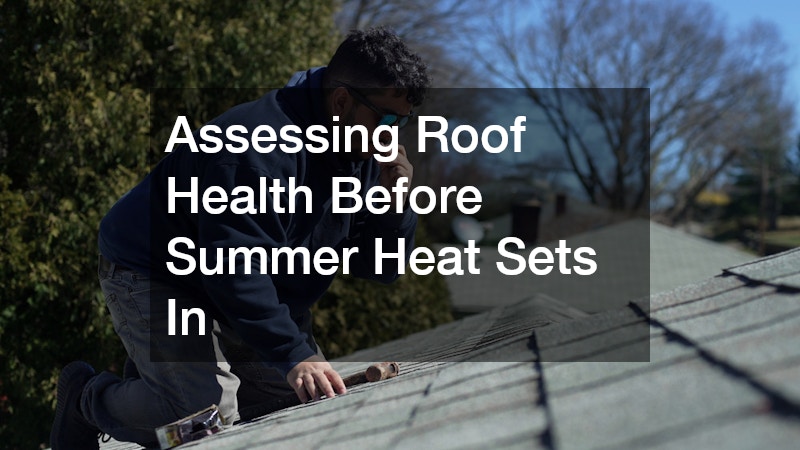
Summer sun and heat can accelerate wear on aging roofing materials, causing shingles to become brittle or adhesive seals to fail. Before temperatures peak, it is worth having a qualified roofing contractor evaluate your roof’s overall condition, especially if it is more than fifteen years old. They can spot early warning signs like blistering, warping, or ventilation issues that trap heat in the attic and shorten the lifespan of shingles.
A professional assessment also gives you a realistic timeline for future maintenance, so you are not caught off guard by a leak during a summer storm. Addressing minor wear now is almost always less expensive than dealing with structural damage later.
- Check attic insulation and ventilation for heat buildup
- Look for blistering or curling shingles
- Inspect seals around vents and skylights
- Ask about the remaining lifespan of your current roof
- Discuss preventive coatings or treatments for UV protection
Inspecting and Maintaining Siding Before Weather Extremes
Siding acts as your home’s first line of defense against wind, rain, and temperature swings, so it deserves a close look each season. Cracks, warping, or loose panels can allow moisture to seep behind the surface, leading to hidden rot or mold that is costly to repair. Even small issues, like a quarter-inch gap or a slightly bowed panel, can widen quickly once freezing temperatures or heavy storms put extra stress on the material.
Many siding companies recommend a visual inspection twice a year, ideally in early spring and again in late fall, before extreme heat or cold sets in. Pay close attention to areas around windows, doors, and corners where seals tend to weaken first, as well as spots where siding meets the roofline or foundation. Look for discoloration, bubbling paint, or soft spots when pressed, since these often signal moisture damage underneath.
It’s also worth checking caulking and flashing during the same walkthrough, since gaps here are a common entry point for water. If you notice fading, chalky residue, or panels that rattle in the wind, these are signs that materials are aging and may need replacement sooner rather than later. Catching these issues early, before a harsh season arrives, can save homeowners hundreds of dollars in repair costs down the line.
Before temperatures drop, walk the full perimeter of your home and look closely at each wall in good daylight. Bubbling paint, soft or spongy spots when you press on the siding, and a musty smell near exterior walls are all signs that moisture has already found its way in. Warped boards, dark streaking, and small gaps where siding panels meet trim or window frames are also worth flagging, since water can enter through openings as small as an eighth of an inch.
Pay particular attention to north-facing walls and areas shaded by trees, as these tend to dry out more slowly and are more prone to mold and rot. Check the bottom few feet of siding as well, since splashback from rain and sprinklers can cause hidden damage over time. A quick tap test with your knuckles can help you spot hollow or soft sections that aren’t visible from a distance.
Addressing these issues early, before winter freezes trap water inside the walls, can prevent far more extensive repairs. Once moisture freezes, it expands, which can crack siding further, push out fasteners, and force you into replacing entire sections rather than making a simple patch. Catching problems now, while temperatures still allow for caulking, painting, or minor repairs, is far more cost-effective than dealing with structural damage in the spring.
- Inspect for cracks, gaps, or warped panels, especially near corners and seams where wind can pry siding loose
- Check caulking around windows and doors, and re-caulk any areas that look dried, cracked, or shrunken away from the frame
- Look for discoloration or bubbling paint, which often signals moisture trapped underneath the surface
- Test for soft spots by gently pressing on panels; give extra attention to areas near the ground and downspouts where water tends to collect
- Examine seams and overlaps for proper alignment, since shifted panels can let water seep behind the siding
- Clean siding annually to remove mildew and grime, using a soft-bristle brush and a mild detergent rather than a high-pressure washer that can force water behind panels
- Trim back shrubs and tree branches touching the siding to reduce moisture retention and scratching
Special Considerations for Metal Roofing Systems
Metal roofs are prized for their durability, but they still require seasonal attention to maximize their long lifespan. Fasteners can loosen over time due to expansion and contraction from temperature changes, so it is smart to have local metal roofers check for loose screws, rust spots, or seam separation at least once a year. Coastal or high-humidity climates can accelerate corrosion, making regular inspections even more important in those areas.
If you are considering an upgrade or repair, working with an experienced metal roofing contractor ensures the job is done to manufacturer specifications, which protects your warranty and performance. Metal roofing can last decades longer than traditional shingles when properly maintained, making seasonal checkups a worthwhile investment.
- Inspect fasteners and seams for looseness
- Watch for rust spots or coating wear
- Clear debris that can trap moisture against panels
- Check for scratches that expose bare metal
- Confirm proper drainage around roof valleys
Understanding Stucco and Exterior Wall Systems
Homes with stucco exteriors face unique maintenance considerations, especially in regions with heavy rainfall or humidity. Cracks in stucco can allow water infiltration that leads to mold growth or structural damage behind the wall assembly. In some renovation projects, homeowners choose to apply stucco over siding to modernize their home’s appearance, but this approach requires careful moisture barrier installation to avoid trapping water against existing materials.
Whether your home has traditional stucco or a hybrid system, seasonal inspections should include checking for hairline cracks, staining, or a hollow sound when tapped, which can indicate delamination. Addressing small cracks with proper sealant before the rainy season begins is far cheaper than repairing water-damaged framing later.
- Inspect for hairline cracks or larger fissures
- Look for staining or efflorescence on the surface
- Tap test sections for hollow sounds indicating separation
- Ensure proper drainage away from stucco walls
- Reseal cracks promptly to prevent water intrusion
Preparing Your Roof and Exterior for Fall Storms

Fall is a critical transition season, since it is your last real opportunity to prepare before winter weather arrives. Trim overhanging tree branches that could snap under snow or ice, paying particular attention to limbs within six to eight feet of your roofline. Falling branches and heavy ice buildup are among the most common causes of roof punctures and dented gutters once winter storms set in.
Clearing leaves and debris from gutters and roof valleys is equally important, since these areas trap moisture that can seep under shingles or refreeze into ice dams. A simple test is to run a hose through your gutters after cleaning to confirm water flows freely toward the downspouts. Check that downspouts extend at least three to four feet away from the foundation to prevent water pooling near your home’s base.
This is also a good time to schedule residential roofing services for a comprehensive check, since technicians can identify weak points before freezing temperatures make repairs more difficult. A thorough inspection typically covers flashing around chimneys and vents, granule loss on shingles, and soft spots that may indicate trapped moisture. Catching these issues in the fall, rather than after the first storm, often means the difference between a minor repair and a costly emergency fix.
Fall inspections often reveal issues that summer heat masked, such as loosened flashing or worn seals around chimneys and vents. UV exposure and thermal expansion during hot months can cause caulking to crack and metal flashing to pull away from its fasteners, creating gaps that only become obvious once cooler weather sets in.
While you’re up there, check for granule loss on asphalt shingles, which often shows up as bald patches or excessive grit in the gutters—a sign that shingles are aging and may need replacement within the next year or two. Also inspect pipe boots and vent collars, since the rubber gaskets around these fixtures typically wear out every 8 to 10 years and are a common source of hidden leaks.
Taking care of these details now, rather than waiting for a winter storm to expose them, helps your roof perform reliably through the season’s harshest conditions. A small tube of roofing sealant and a few replacement shingles can resolve minor issues for under $50, while catching a failing seal early may save you from a much costlier interior water damage repair later.
- Trim tree branches within 6-10 feet of the roofline to prevent wind-driven limbs from scraping shingles or snapping onto the roof during storms
- Clear leaves and debris from valleys and gutters, checking downspouts for clogs that can cause water backup and ice dams later in winter
- Inspect chimney flashing and seals for cracks or rust, since even small gaps can let water seep into the attic during heavy rain
- Check attic insulation levels before cold weather, aiming for at least R-38 in most climates to reduce heat loss and prevent roof-damaging ice dams
- Look for cracked, curling, or missing shingles that could worsen under high winds and lead to leaks
- Schedule a professional inspection before the first freeze to catch hidden issues like soft decking or worn sealant before they become costly repairs
Winter Readiness and Protecting Against Ice Damage
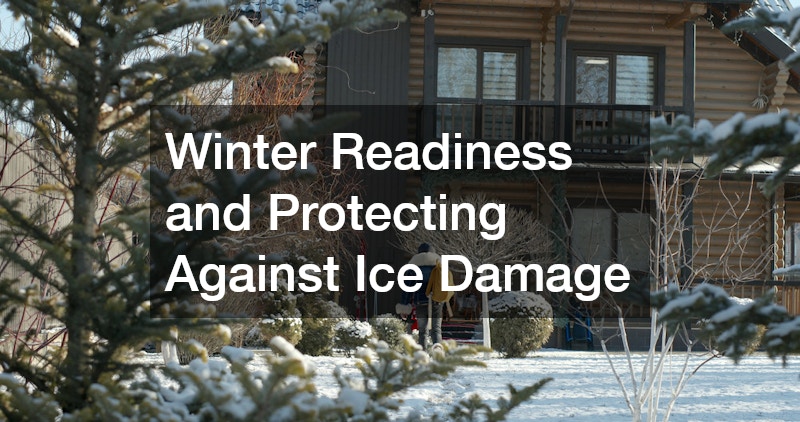
Winter presents unique risks for your home’s exterior, particularly from ice dams that form when heat escapes through the roof and melts snow unevenly. This melted water can refreeze at the eaves, forcing water backward under shingles and into the attic. Proper attic ventilation and insulation are your best defenses, since they keep the roof surface at a more consistent temperature and reduce uneven melting.
Aim for at least R-38 insulation in the attic floor and a balanced ventilation ratio of roughly 1 square foot of vent per 300 square feet of attic space, split between soffit and ridge vents. Sealing air leaks around light fixtures, exhaust fans, and the attic hatch prevents warm household air from sneaking upward and warming the roof deck unevenly.
Before the first snowfall, clear gutters and downspouts completely so meltwater has somewhere to go instead of pooling at the roof edge. A roof rake can safely remove excess snow load after storms, and homeowners in ice-prone regions may also consider self-regulating heat cables along the eaves as an added layer of protection.
Ice dams form when heat escaping from the attic melts snow on the upper roof, which then refreezes at the colder eaves and trapped water works its way under shingles. If this cycle has caused recurring leaks, stained ceilings, or damaged gutters year after year, it may be time to consider roof replacements rather than continuing to patch the same vulnerable areas each season.
A full replacement allows for modern ice-and-water shield underlayment along the eaves, typically extending at least 3 to 6 feet up from the roof edge, which creates a much stronger barrier against meltwater intrusion. Upgraded soffit and ridge ventilation can also be installed at the same time, correcting the attic temperature imbalances that cause uneven snowmelt in the first place.
Before committing to roof replacements, have a contractor inspect attic insulation levels and air-sealing around penetrations like vent pipes and recessed lighting, since heat loss through these gaps is often the root cause of ice dam formation. Addressing insulation alongside the roofing work can prevent the problem from simply returning after a few winters.
- Improve attic insulation to at least R-38 to R-49 (climate-dependent) and seal around penetrations like vent pipes, wiring, and recessed lights to stop warm air from escaping into the attic
- Ensure balanced intake and exhaust ventilation, with soffit vents drawing cold air in and ridge vents letting warm air out, to keep the roof deck at a consistent, cold temperature
- Remove heavy snow buildup safely when possible, using a roof rake from the ground for accumulations over 6-8 inches rather than climbing onto the roof
- Watch for icicles along the eaves, which often signal ice dam formation caused by melting snow refreezing at the roofline
- Check attic floors for dark streaks or moisture stains after storms, an early warning sign of ice dam leaks before they reach living spaces
- Consider heat cables in chronic problem areas like valleys, dormers, and north-facing eaves that rarely get direct sun
- Keep gutters and downspouts clear of debris before the first freeze so ice has fewer places to accumulate
Choosing the Right Professionals for Ongoing Exterior Care
Finding trustworthy help for exterior maintenance makes seasonal upkeep far less stressful, but not all contractors offer the same level of expertise. When researching local siding companies, ask about their experience with your specific siding material, since techniques vary widely between vinyl, wood, fiber cement, and stucco applications. Checking reviews, licensing, and insurance is essential before committing to any exterior project.
For roofing needs specifically, look for contractors who offer clear inspection reports and itemized estimates rather than vague verbal assessments. Getting multiple quotes for significant work, including roof repairs or larger exterior projects, helps you compare pricing fairly and avoid overpaying for basic maintenance tasks.
- Verify licensing and insurance before hiring
- Ask for references from recent local projects
- Request written, itemized estimates
- Compare warranty terms across contractors
- Read online reviews for patterns in customer experience
Staying ahead of exterior wear does not require constant effort, just a consistent seasonal rhythm of inspection and minor upkeep. By addressing small issues in spring, summer, fall, and winter, you can avoid the far larger expense of emergency repairs or premature replacements. Keep a simple checklist for each season, and do not hesitate to bring in a qualified professional when something looks beyond a simple fix. Taking these steps now will protect both your home’s value and your peace of mind for years to come.